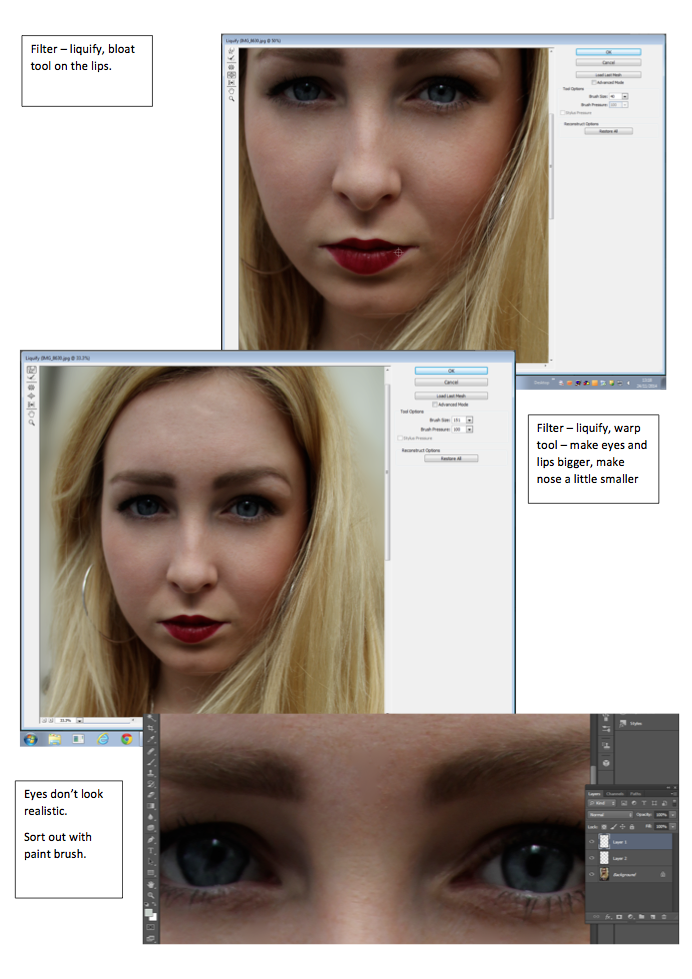
Here, you can see I have gone through a number of small stages to improve my image and alter it to make it seem more 'perfect'. I did this using Photoshop - a software that i'm not familiar to using. But by playing around and spending time experimenting I have developed new skills which will then help me edit my photos for my magazine. On this photograph of Siobhan I firstly blurred out the background to make her stand out further. I also used the spot healing tool and patch healing tool to create smooth and clear skin and also got rid of any stray hairs that were covering certain parts of her face. After that, I used the lasso tool to select half of her eye and copy and pasted in into a new layer. I then dragged this new eye layer down making her eyes look bigger - giving a 'disney eye' effect to the photo. I then Liquified the photo, this means that I can move any part of the photo using a bloat tool - making parts of the image bigger and also the Warp tool - moving parts of the image around. I used both of these tools to shorten her nose and also enlarge her lips. I also used these tools to make her eyes even bigger. After I had done this, I noticed that her eyes didn't look realistic and you could see a clear line where I had made them bigger. So to fix this, I used my paint brush tool, by copying colours of the eye that were already there I created new lines making the pupils line up and therefor looking more realistic. I also used the clone tool to copy and paste parts of the eye that were more complex. Overall she looks more airbrushed and I have tried to 'perfect' the image. I am happy with the results and doing this has given me more confidence to use photoshop to edit and manipulate images.


No comments:
Post a Comment